How to Use Nano Banana on Omnely: Pick a Model, Prompt and Edit
How to use Nano Banana on Omnely: pick Nano Banana Pro or 2, prompt, set aspect ratio and resolution, and edit with references, with real outputs.
Learning how to use Nano Banana on Omnely comes down to six repeatable steps across Google's two image models, Nano Banana Pro and Nano Banana 2, both inside the Omnely /image workspace. This guide walks through each step with a real output from a single run, so the examples show what one prompt actually produced rather than a cherry-picked best of many.
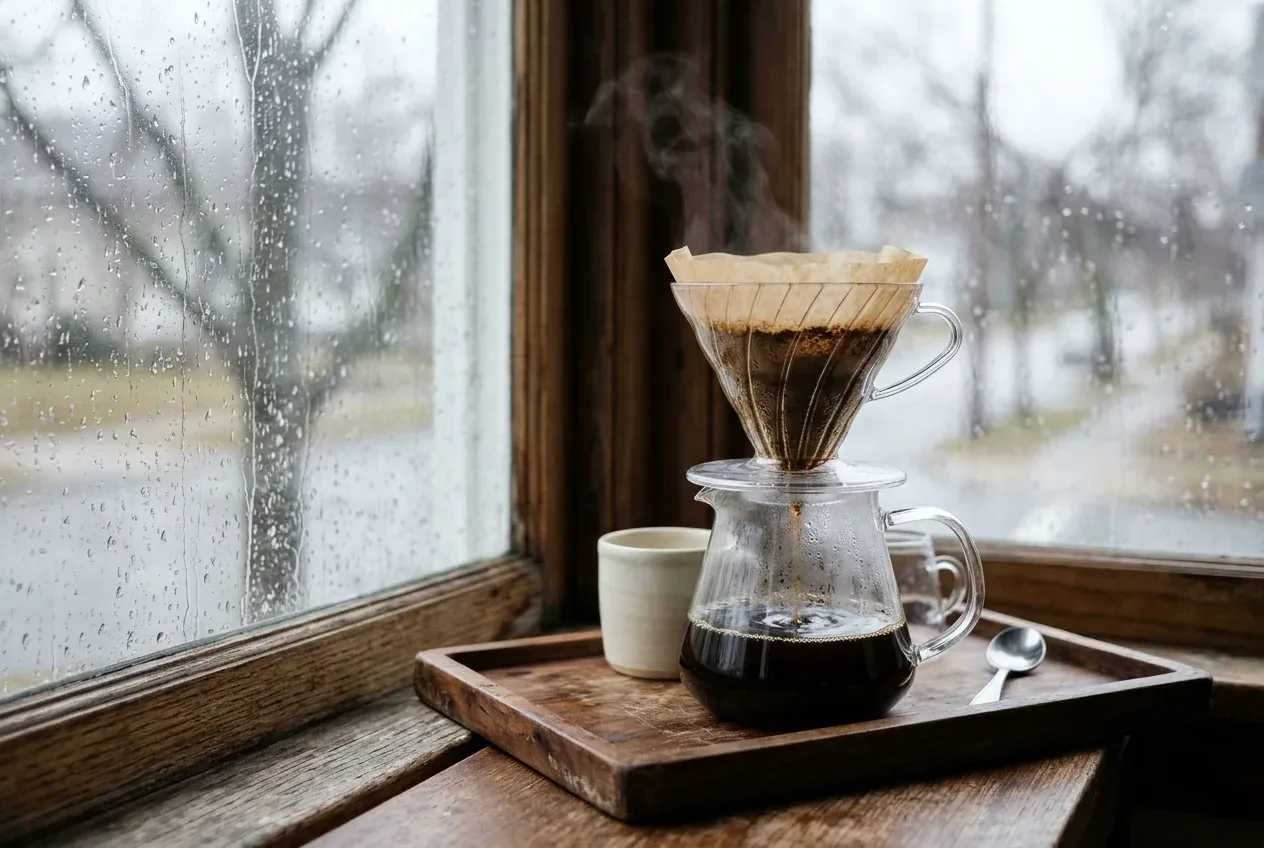
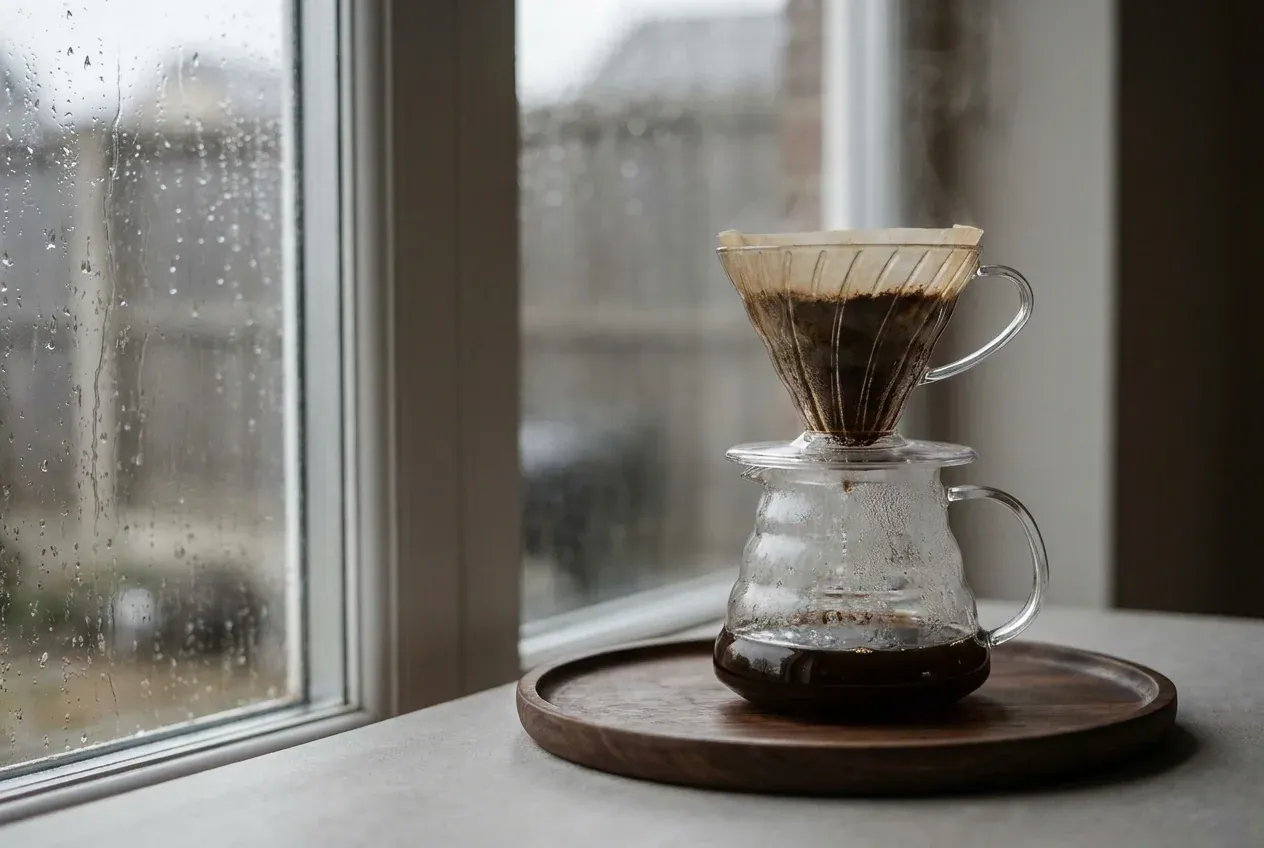
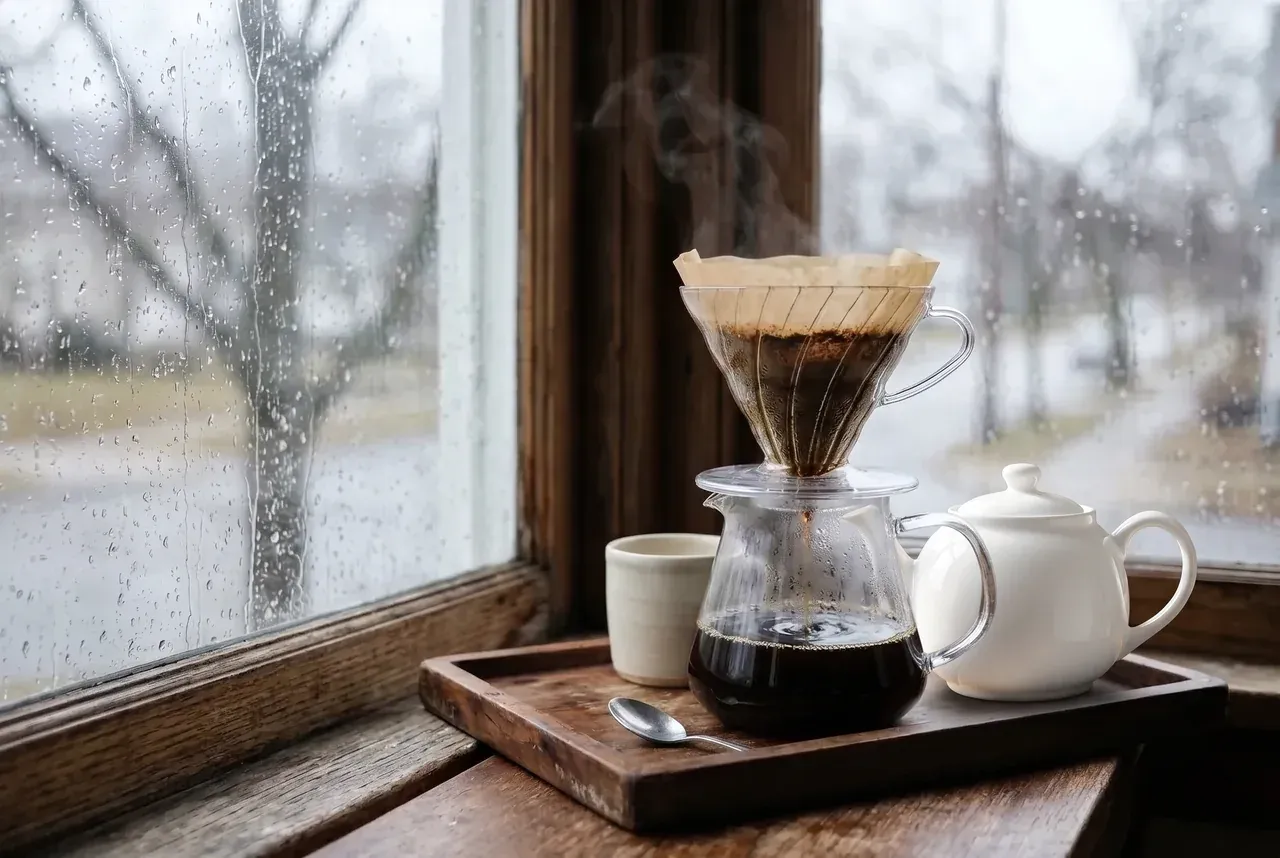
Step 1 prompt, run on both models:
Photorealistic still life of a glass pour-over coffee dripper on a small walnut tray beside a rain-streaked window, soft grey daylight from the left, steam rising from the carafe, shallow depth of field, muted warm tones, no text, no logo
Nano Banana 2, 3:2, 1K, one run (real Omnely output).
Nano Banana Pro, same prompt, 3:2, 1K, one run (real Omnely output).
Model pages: Nano Banana 2 and Nano Banana Pro.
Nano Banana Pro or Nano Banana 2: which to pick
Both models live inside the Omnely image workspace. They share the same ten aspect ratios and the same three resolution tiers, and both can run text to image or an edit with reference images attached. The differences that matter for picking one are the maximum reference count on Omnely and how Google positions each model.
| Spec | Nano Banana 2 | Nano Banana Pro |
|---|---|---|
| Maker model name | Google Gemini 3.1 Flash Image | Google Gemini 3 Pro Image |
| Reference images on Omnely | Up to 8 | Up to 14 |
| Resolutions | 1K, 2K, 4K | 1K, 2K, 4K |
| Aspect ratios | 1:1, 16:9, 9:16, 4:3, 3:4, 21:9, 3:2, 2:3, 5:4, 4:5 | 1:1, 16:9, 9:16, 4:3, 3:4, 21:9, 3:2, 2:3, 5:4, 4:5 |
| Best fit per Google's framing | Faster everyday generation and edits | Higher detail work and text-heavy images |
Google's own help pages position Nano Banana 2 as the faster image model and Nano Banana Pro as the higher-detail option, especially for pictures that need legible text. The side-by-side above is a single run of the same prompt on each model and should not be read as a verdict about either one.
How to use Nano Banana in 6 steps
The six steps below move from a first prompt to editing with references and finally to larger outputs. Each example is a single generation, one run, no re-rolls.
Step 1: Open /image and pick the model
Open the Omnely /image workspace, pick either Nano Banana 2 or Nano Banana Pro from the model list, and paste a prompt. The two Step 1 outputs at the top of this post come from the pour-over coffee prompt above, run once on each model with no other changes.
What the output shows: the Nano Banana 2 run placed the glass dripper and carafe on a square rustic walnut tray on a wooden window ledge, with rain drops on the window, visible steam above the dripper, and a small cream cup and a spoon added on the tray. The Nano Banana Pro run put the same dripper and carafe on a round smooth walnut tray on a pale counter, with rain on the window, cleaner and more minimal, no steam visible, and no cup or spoon. These are single examples, one run each, so this comparison is not a verdict on either model.
Step 2: Write a plain, specific first prompt
A workable Nano Banana prompt names a subject, a setting, a light direction, a camera point of view and a style, in roughly that order. Short lists of specifics tend to land more cleanly than one long run-on sentence.
Subject: a vintage red bicycle with a wicker front basket full of lemons. Setting: leaning against a weathered blue wooden door in a narrow whitewashed alley. Light: late-afternoon sun raking across the wall, crisp shadows. Camera: eye level, 35mm lens, the whole bicycle in frame. Style: photorealistic travel photo, natural colors, no text, no logo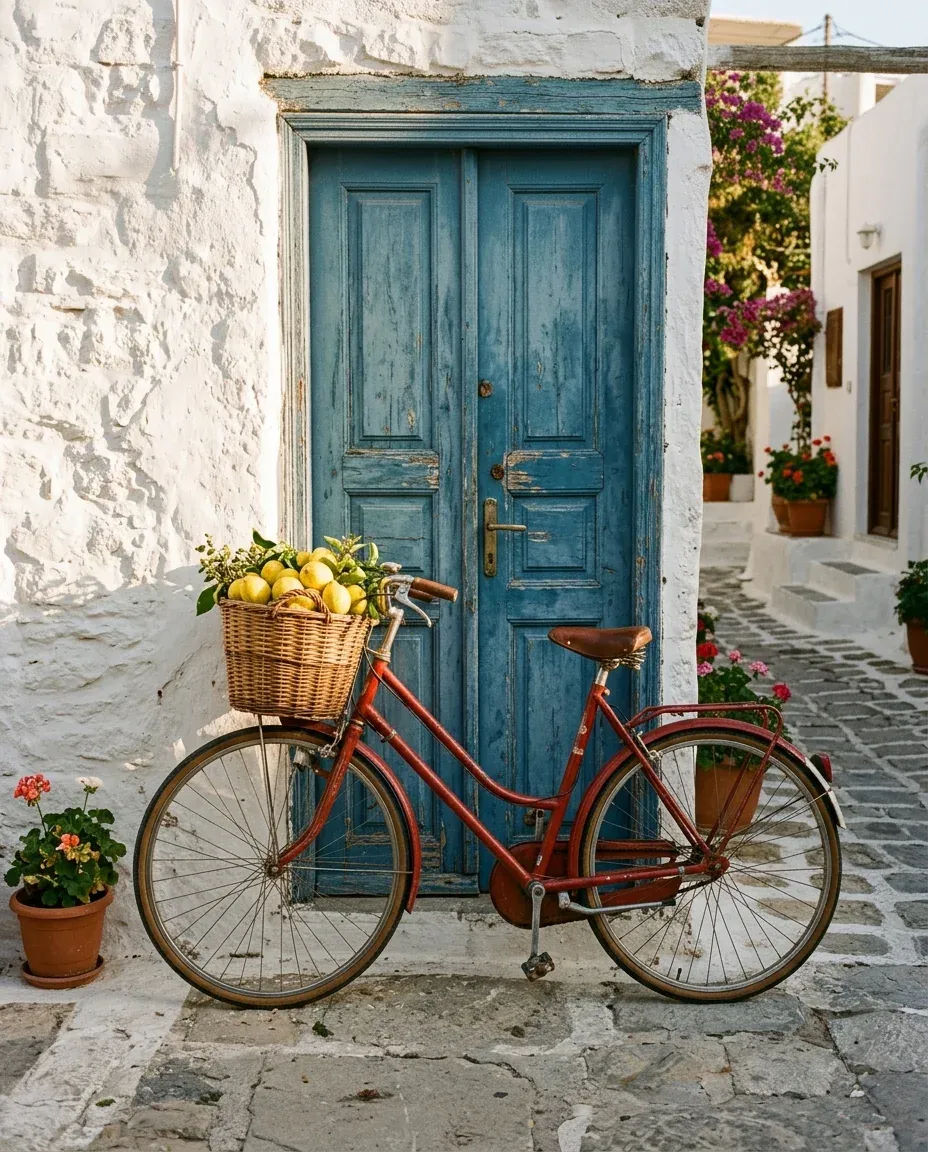
Nano Banana 2, 4:5, 1K, one run.
What the output shows: a red step-through bicycle with a wicker basket of lemons leaning against a weathered blue double door in a whitewashed alley, with potted flowers, a pink bougainvillea on the wall, and a warm low sun. This is a single run.
Step 3: Set the aspect ratio and resolution
Both Nano Banana models expose ten aspect ratios (1:1, 16:9, 9:16, 4:3, 3:4, 21:9, 3:2, 2:3, 5:4, 4:5) and three resolutions (1K, 2K, 4K). Pick these before generating, since changing them later means a fresh generation rather than a reshape of the existing one.
Wide cinematic banner photo of a row of pastel fishing boats pulled up on a pebble beach at dawn, low mist over calm water, a single gull overhead, soft pink and blue light, plenty of empty sky on the right for text, photorealistic, no text, no logo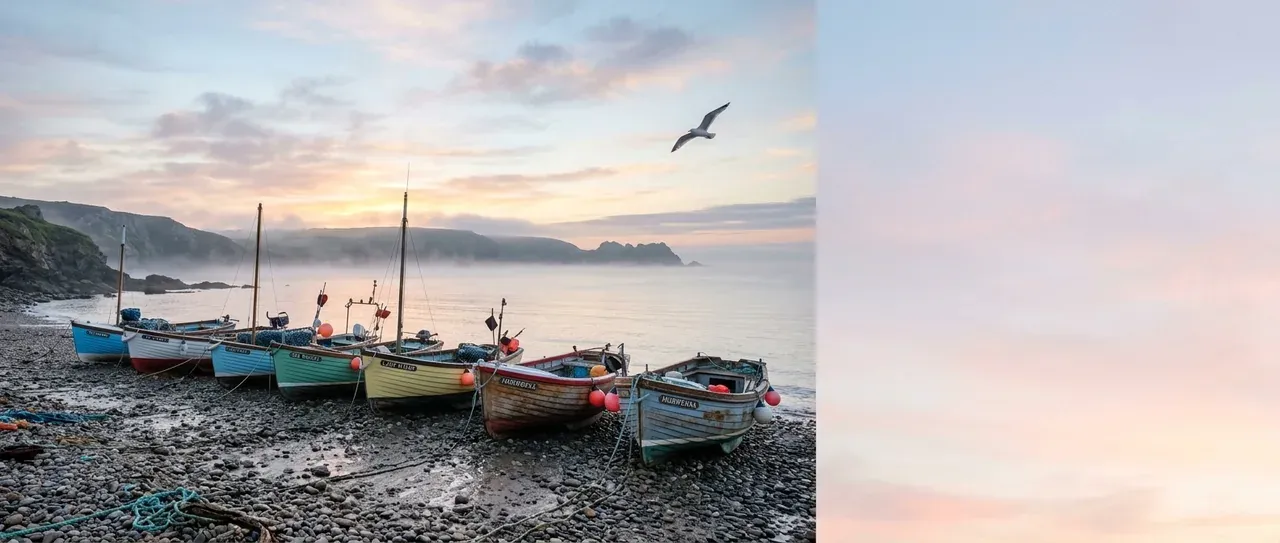
Nano Banana 2, 21:9, 1K, one run. The right third came back as a flat gradient.
What the output shows: pastel fishing boats on a pebble beach at dawn, mist over the water, a pink and blue sky and one gull. The right third of the frame came back as a flat pink and blue gradient with no scenery, because the phrase "empty sky on the right for text" was taken very literally and produced a blank panel instead of continued sky with clouds. One run, 21:9, 1K. Lesson: for a usable copy area, ask for "open sky" as part of the scene rather than "empty space for text", or the model may hand back a flat panel.
Step 4: Put readable text in the image
Nano Banana Pro is the model Google positions for text-heavy images. Spelling out the exact words in quotes and adding a phrase like "spelling exactly as written" helps the model treat the string as a literal label rather than a loose suggestion.
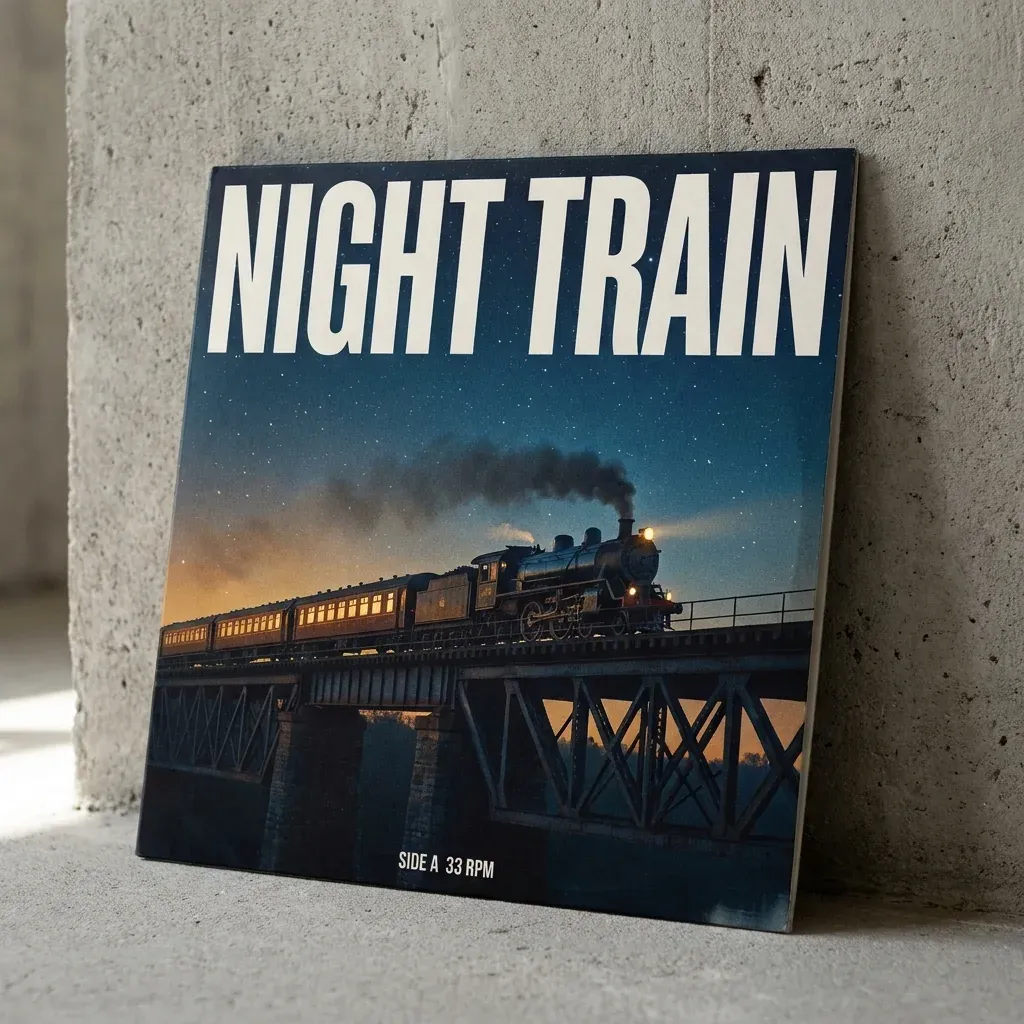
Square product photo of a 12-inch vinyl record sleeve leaning against a concrete wall, the sleeve shows a night train crossing a bridge under a starry sky in deep blue and amber, large white condensed letters across the top read "NIGHT TRAIN", small letters at the bottom read "SIDE A 33 RPM", soft side light, photorealistic, spelling exactly as written
Nano Banana Pro, 1:1, 1K, one run. Both text lines spelled correctly in this run.
What the output shows: a record sleeve leaning on a concrete wall, a steam train crossing a steel bridge under stars, "NIGHT TRAIN" in large white condensed letters across the top and "SIDE A 33 RPM" small at the bottom, both spelled correctly in this run. One run, 1:1, 1K, Nano Banana Pro. Different prompts will not always land typography on the first try, and short phrases are easier for the model than paragraphs.
Step 5: Edit with a reference image
To run an edit, drag one or more reference images into the /image workspace along with the prompt. Supported file types in the workspace are JPEG, JPG, PNG and WebP. The moment a reference is attached, the job runs as an edit instead of text to image. Through the Omnely API, references are passed as public image URLs rather than file uploads.
Start with a clean base image:
Photorealistic product shot of a white ceramic teapot on a plain light grey seamless background, soft even studio light, gentle contact shadow, square composition, no text, no logo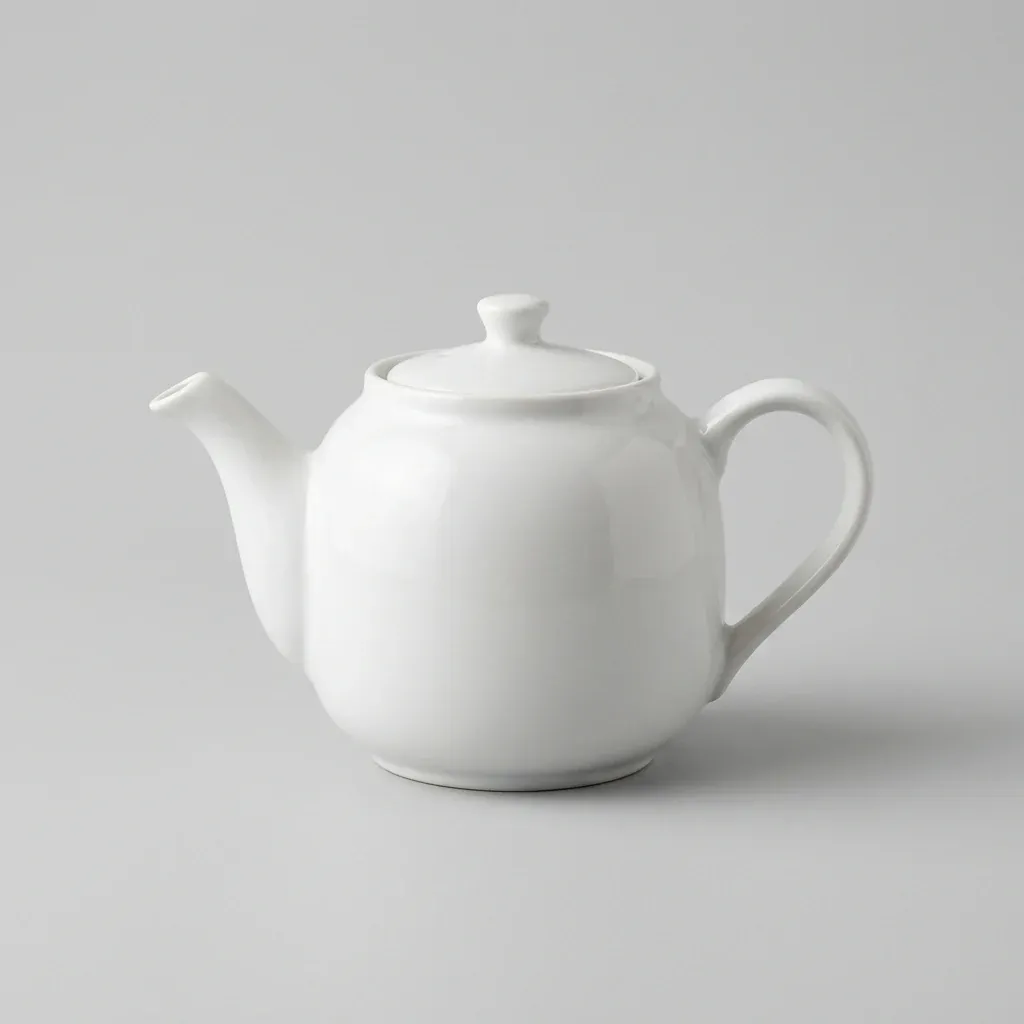
Base image: Nano Banana 2, text to image, 1:1, 1K.
What the output shows: a plain white ceramic teapot on a light grey seamless background, soft shadow, square composition. Single run, 1:1, 1K, Nano Banana 2.
An earlier edit used a loose "keep the teapot and change the background" instruction and drifted:
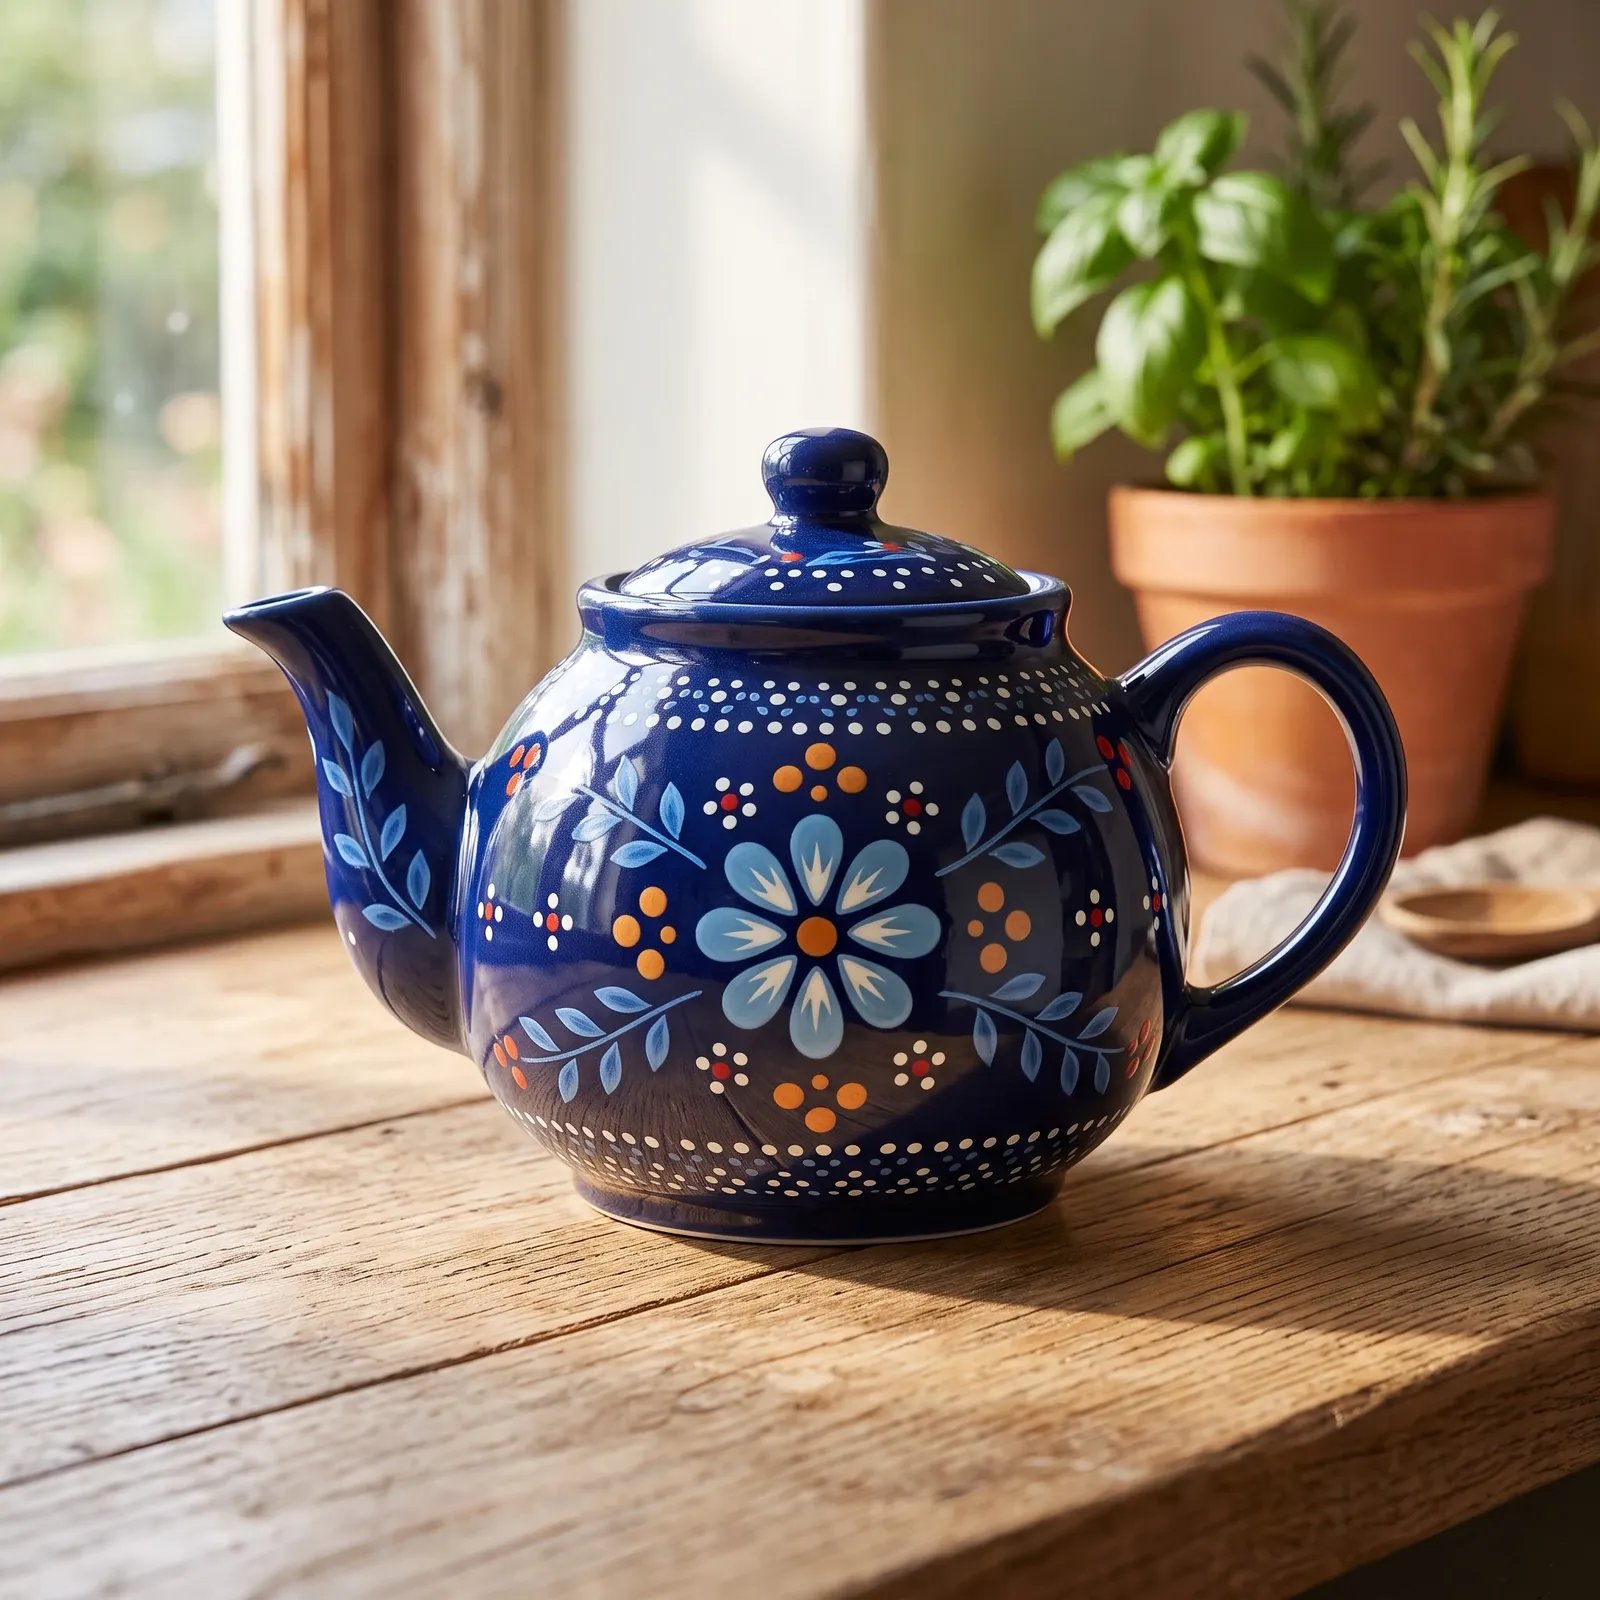
Loose edit instruction: the teapot drifted to blue with a floral pattern (Nano Banana 2).
What the output shows: the teapot came back blue with a floral pattern, which is drift from the base image. The model treated "keep the teapot" as a soft hint, not a lock on color or pattern. Single run.
The fix is to spell out what must stay the same (color, pattern, shape, angle) and say "only replace" the single thing that should change:
Edit the reference image: keep the plain white ceramic teapot exactly as it is (same pure white color, no pattern, same shape, same angle) and only replace the grey studio background with a sunlit rustic wooden kitchen counter, soft morning window light from the left, a blurred potted herb in the background. No text, no logo.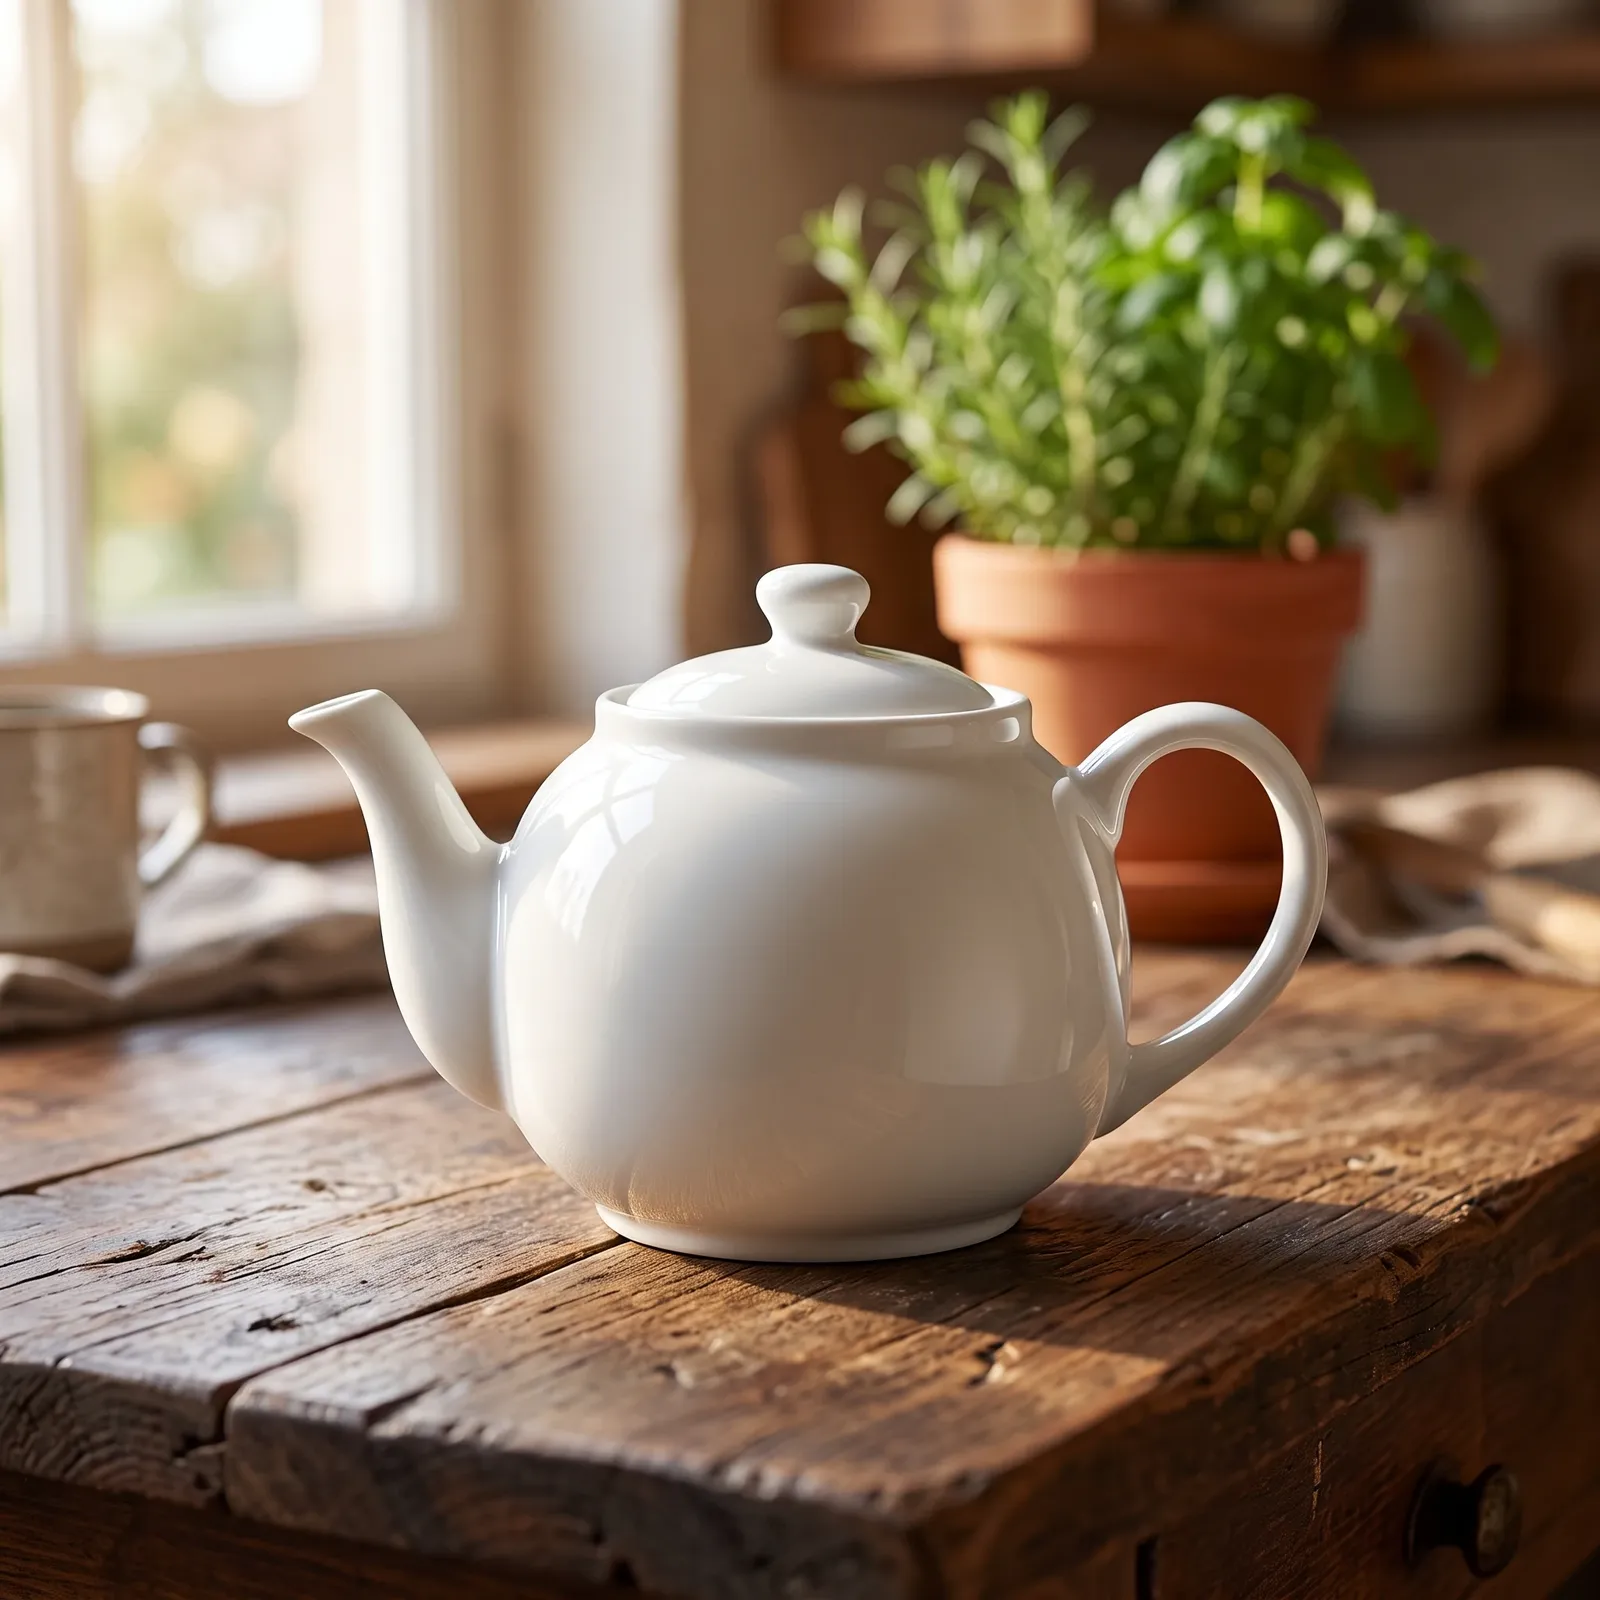
Fixed edit: Nano Banana 2, 2K, one reference image.
What the output shows: the same pure white teapot, unchanged shape, now on a sunlit wooden kitchen counter with soft window light from the left and a blurred herb plant in the background. Single run, 2K, Nano Banana 2 with the base image as the one reference. Lesson: name what stays and name what changes, and change one thing per message when possible.
Combining two references works the same way, with both images attached and the prompt describing exactly which element to take from which image:
Combine the two reference images: place the plain white ceramic teapot from image 1 on the walnut tray from image 2, just to the right of the glass coffee dripper. Keep the teapot pure white with no pattern and the same shape. Keep the rain-streaked window, grey daylight from the left and muted warm tones of image 2. Photorealistic, no text, no logo.
Nano Banana 2, two references, 3:2, 2K, one run.
What the output shows: the Step 1 Nano Banana 2 scene with the plain white teapot now on the walnut tray to the right of the glass dripper, the teapot still pure white with no pattern, the rain-streaked window, grey daylight and steam kept from image 2. The spoon moved to the front of the tray. Single run, 3:2, 2K, Nano Banana 2, two references.
Step 6: Get a larger image by generating at 4K
Nano Banana itself does not have an upscale control. The way to get a larger Nano Banana image is to pick 2K or 4K before pressing generate. Running the same prompt again at 4K produces a brand new image, not an enlargement of the earlier one.
The Step 2 prompt was re-run with no changes except the resolution set to 4K:
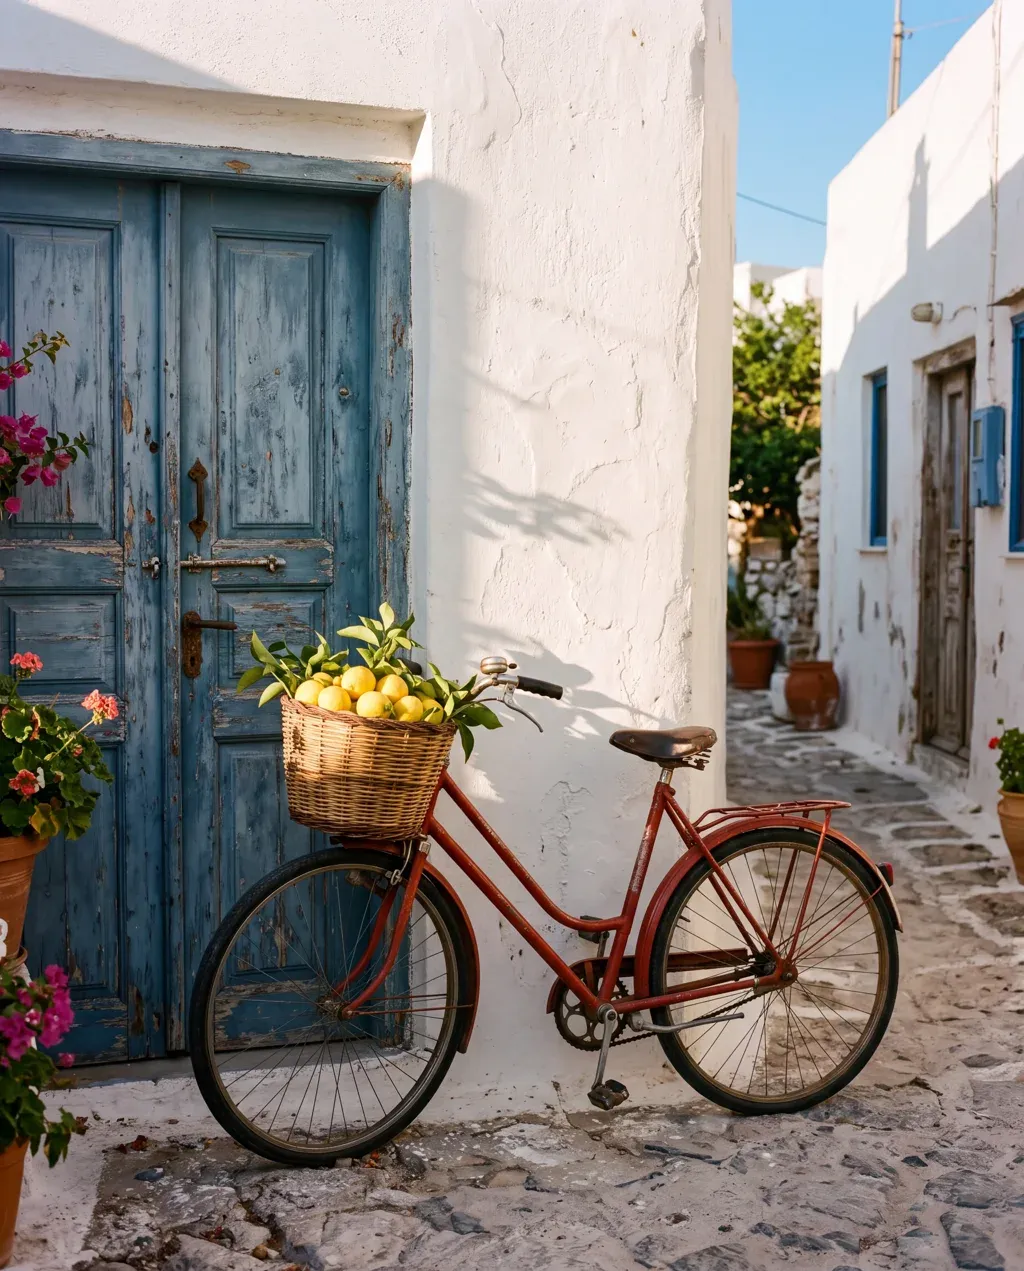
Nano Banana 2, same prompt as Step 2 at 4K (native 3712 x 4608, shown scaled down). A new composition, not an enlargement.
What the output shows: the output is 3712 x 4608 pixels, compared with about 928 x 1152 pixels at 1K in Step 2. It is a different picture, with a different door, a different alley and a different bicycle angle. Single run, 4:5, 4K, Nano Banana 2.
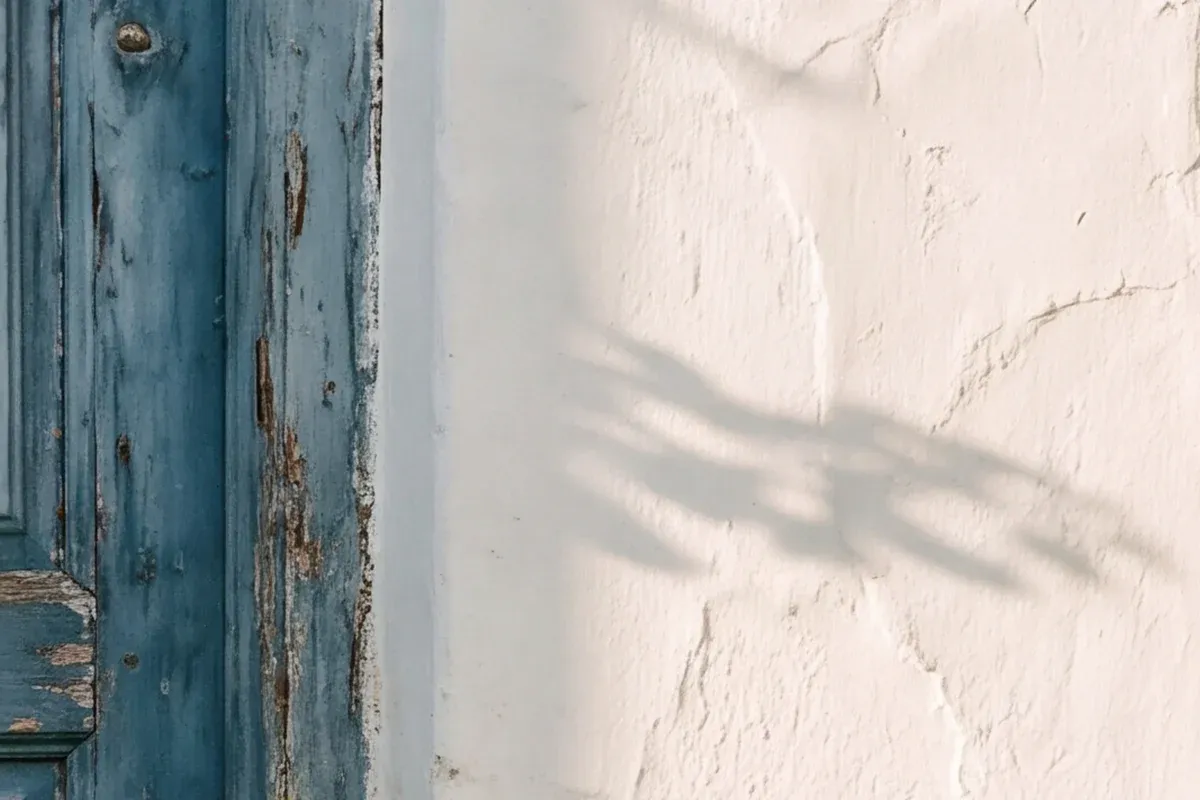
100% crop from the 4K output above.
What the output shows: a 100% crop of the 4K output showing peeling blue paint, cracked plaster and a leaf shadow, crisp at full size. Single crop from the single run above. Lesson: pick 4K before generating the composition that matters, since a re-run at a higher resolution will not preserve the earlier framing.
Fixes when Nano Banana drifts
- Try listing what must stay the same before listing what should change, for example "keep the pure white color, no pattern, same shape, same angle" and then "only replace the background".
- Try changing one element per message during an edit chain, since stacking several edits in one prompt tends to let unrelated attributes drift.
- Try replacing instructions like "empty space for text" with scene language such as "open sky with light clouds", so the model fills the area with the scene rather than a flat panel.
- Try switching to Nano Banana Pro for prompts with required text strings or fine typography, since Google positions Pro as the higher-detail, text-heavy model.
Keep going
- How to use Nano Banana Pro: a deeper walkthrough of Nano Banana Pro on its own.
- Nano Banana prompt library: a set of prompts tested on both Nano Banana 2 and Nano Banana Pro.
Research sources named in this guide: Fello AI's how to use Nano Banana guide (change one thing per message when editing), Tom's Guide's how-to walkthrough (refine in follow-ups, background swaps, combining photos), and Google's Gemini help pages on Nano Banana 2 and Pro roles.
FAQ
Can Nano Banana enlarge an existing image on Omnely?
No. Nano Banana 2 and Nano Banana Pro both expose 1K, 2K and 4K as generation resolutions, and a re-run at a higher resolution produces a new image rather than enlarging an existing one.
How many reference images can Nano Banana 2 take on Omnely?
Up to 8 reference images on Omnely. Google's own documentation lists a higher number for the underlying model, but the Omnely limit is 8. Nano Banana Pro on Omnely accepts up to 14 reference images. Supported file types in the /image workspace are JPEG, JPG, PNG and WebP, and through the Omnely API references are passed as public image URLs.
Which is better for text?
Per Google's framing, Nano Banana Pro is the model to pick for images with required text, since it is positioned as the higher-detail, text-heavy option. Nano Banana 2 is positioned as the faster model for general image work. The Step 4 vinyl sleeve run above used Nano Banana Pro and landed "NIGHT TRAIN" and "SIDE A 33 RPM" correctly on a single generation, but single runs are not a verdict and typography accuracy will vary by prompt.
Can new users try Nano Banana on Omnely?
New users get free credits to try the image models, including Nano Banana 2 and Nano Banana Pro. Beyond those trial credits, generating with the image models needs a paid Omnely plan. Both models have their own pages at /models/nano-banana-2 and /models/nano-banana-pro.
Ready to run the six steps on a prompt of your own? Open the Omnely image workspace, pick Nano Banana 2 for speed or Nano Banana Pro for detail and text, and start with a plain, specific prompt.